Is the time flying by for you like it is for me? We just picked up some beautiful what?…… Are they pumpkins? Are they gourds? It was so spontaneous and unplanned. They were sitting outside of the market and we just had to have them. Now they wait on the counter while the kids draw up plans to make tiny Smurf homes out of them. LOL Our annual trip to the pumpkin patch isn’t planned till this Sunday. I wonder what we will come back with then. Hmm…..
But pumpkins aren’t why we are here today. It’s Thursday, time for another “NO Budget” (the husband doesn’t let me spend any money) craft! This time it’s all about lanterns, the soft sparkly glow of Halloween lights illuminating canning jars to be exact. When the concept for this idea first popped into my head, I had no idea where to buy canning jars. You see, I don’t do canning – EVER! I drove all over, stopping at multiple places. Would you believe I finally found a nice little set of four at Target? With the jars finally procured, I was ready to begin.
Here is what you will need:
- Short canning jars
- Glitter in color of your choice
- Paints in color of your choice

- Masking tape/Painter’s tape
- Decorative ribbon for lid
- Stiff clear plastic
- Stiff scrapbooking paper
- Tacky glue or Elmer’s glue
- Simi wide paint brush
- Painter’s sponge
- Tweezers
- Scissors
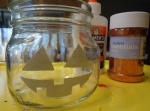
 Make sure your jar is clean of dirt and dust. Set the jar aside. Take your masking tape and draw lantern eyes and mouth (We ended up using painters tape in the end, it worked the best). Make the eyes and mouth simple, yet large enough to be seen. Too much detail and you will have trouble removing the tape later. We made a wide open mouth with small vampire teeth on the top, although a more traditional smile is shown. The traditional smile proved to be problematic in the tape removal process. Cut the shapes out and apply them to the inside of the canning jar. We chose to place them on the side opposite the “Ball” name.
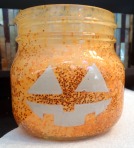
 Make sure your lantern face is pressed firmly into place. Using your paint brush lightly brush the inside of the jar with the tacky glue. Once the entire jar is covered, VERY lightly sprinkle with glitter (The example shown has a little more glitter than I care for on the front). I don’t recommend sprinkling straight from the container; spoon out a small amount (using a baby spoon) and gently shake the glitter in. Once the glitter is on all sides of the jar, including the bottom, gently remove your masking tape templates. I used the tweezers for this as I found my fingers too big and clumsy. Be careful not to crunch the edges as you will be reusing these templates. Stick them to the outside of the jar for a quick find later. Set the jar aside so that it may dry thoroughly. If you don’t remove the tape, the glue will dry over it making it harder to remove and destroying the lantern face when you finally manage to get it out.
 Once the glue is dry it should be transparent so that all you see is the glitter and the clear space where your lantern face is. Align your tape template back into place and press down firmly. It’s time to paint the inside. Yay! I chose a golden glass paint followed by a traditional orange for pumpkin, but you can do just about anything your imagination can come up with. Sponge paint inside the jar, over the glitter pressing lightly over
  the face to avoid bleeding. Don’t worry if bleeding does occur, I have an answer for that later. If you are doing multiple colors, the fun is in the blending so go right into the second color while the first is still damp. In the original supply picture you may have noticed a feather and rose sponge on a handle, this is because you have options open to you on your paint application. Never limit your imagination! When you are done painting your jar, promptly remove the masking tape again before the paint dries. You may now discard the tape.
- If some paint did bleed into the areas of your lanterns eyes and mouth, simply wipe the access with a Q-tip then come back for a second pass with a little nail polish remover on the Q-tip. That will get rid of any unwanted paint smears and leave the glass looking sparkling clean.
 Now all the jars need is time to dry. Grab a lid and pop out the center. Using it as a guide, outline it on the colored paper and the clear plastic (I am so cheap I used the clear plastic cover to a card box I was ready to discard). Cut these circles out, trimming until they fit easily into the lid. On the backside of the colored
 paper outline a simple Halloween object (I chose a ghost) and cut it out. Don’t pick some-thing too difficult, like an arched back cat. You’ll hate yourself later. Placing the colored paper on top of the clear plastic, put them in the lid together in place of the piece you removed and screw onto the jar.
- Having the lid in place you can now start gluing your ribbon in place starting from the back. Run the ribbon all the way around the lid, using just enough glue to tack it into place nicely. Don’t over glue or you’ll get a gooey mess oozing out the sides. We don’t want that. Trim the end when you have made it all the way around and let it dry nice and hard.
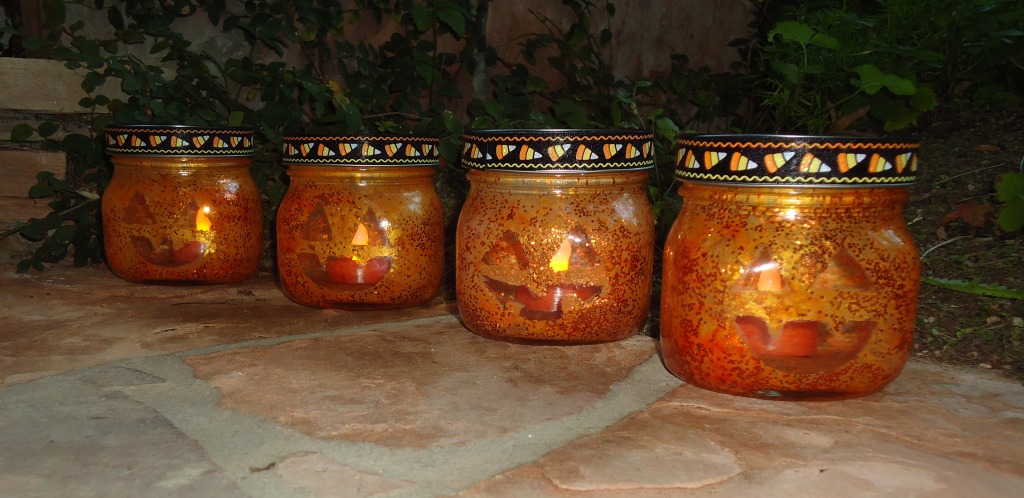
When everything has dried (glue and paint) you are ready to add the flameless tea lights to the interior of the jar. I found they have some really nice orange based ones this year with a nice strong flame. Turn the little lamp on and put the lid back in place.
You now have a beautiful new set of Halloween lanterns to decorate your front walk or mantel that everyone will adore! Hope you enjoyed this craft! I would love to hear from you.
If you missed last week’s craft check out my Wicked Wreath of Delight, and if crafting’s your thing, be sure to check back next week to see what we come up with. Happy crafting everyone!


Those are awesome! I just found this great candle in a local boutique that is scented “pumpkin pecan souffle”. It smells EXACTLY like a toasted pecan. It would be great in there 🙂
I am glad you like them Sara. Those candles sound heavenly! Just make sure to use the proper paint if you will be putting real candles inside. I would think glass paints would be safe, but always read the fine print. We wouldn’t want all your hard work to go up in smoke! Thanks so much for stopping by!
SO cool! I love how you give little tips like, don’t use an arched cat, you’ll hate yourself later. Those tidbits are priceless (and make me wonder if you found out by trial and error)!
I’ll have to try out a few of these. I’m already thinking of what I can make for Christmas. Such a great idea and I love that you use flameless candles. No fire worries (which we have to be careful of here in Cali).
Thanks for the great craft!
Glad you like! I have learned by trial and error. That’s why the mouth pictured was changed for the rest of the lanterns. Not the easiest to work with.
Having small children, we always go flameless. We don’t take chances. We live too close to an area that likes to burn far too often.
I just finished the 4th lesson in Kristen Lamb’s blog course. It looks like my blog will be undergoing some changes. There may not be as many crafts going forward. But I am more than happy to share with you any time! We make custom ornaments every year to mark what each kid was seriously into for that year. It’s been a lot of fun.
Thanks for popping by Tameri. It is always a pleasure!
Those luminaries are not only really cute but they are “pretty” too!!
Thank you. I am glad you like them. Thank you for stopping in to comment. 🙂
Oh my gosh, I love these! I love doing luminaries, but I’m always so nervous about the paper bags! These are fantastic!
You are not alone there! Anything ready to spark and burn is a no-no for me. LOL I like to keep my stuff, thank you! Dealing with fire damage is NO fun. Glad you like them. So happy you could stop by Myndi!
This is just so fun. Thank you for the creative lanterns Debra!
Thank you Suma. Thanks for stopping by!
Hi there i am kavin, its my first occasion to commenting anyplace, when i
read this article i thought i could also make comment due to this brilliant
article.