Are you a lover of movies? Do you lose yourself in your favorite television shows for an hour at a time?
Maybe something about THOR! You miss him, don’t you? He’s currently helping Samantha Warren in the state of New York. She’s been busy dealing with our Norse god AND GISHWHES at the same time. She’s one amazing lady. Check out Thor’s latest. While you’re there tour Samantha’s beautiful site.
Thor in Upstate NY
He Has Arrived
Over the weekend my family and I spent a day at Universal Studios where we toured the lot and film sets. It’s almost easy to buy into the make-believe. Except, many of the beautiful homes and buildings that make up the created worlds found there are merely false fronts―nothing more than a fabricated cover without substance.
When I was in junior high my father took my family to the set of the Ponderosa Ranch House on Lake Tahoe. Before our arrival I had been enamored with its grander. I would soon be disillusioned and learn the truth of how a film set worked. Stairs led to nowhere and walls pushed out to allow room for the cameras and crew.
I wanted the illusion―the creation. Not the set.
Now that I’m older and have a tiny bit of talent I say…bring that illusion to life in your own home.
That’s what we did when it came time to redo our son’s room. The previous owner had painted the room in very graphic theme, something that wasn’t to my son’s liking.
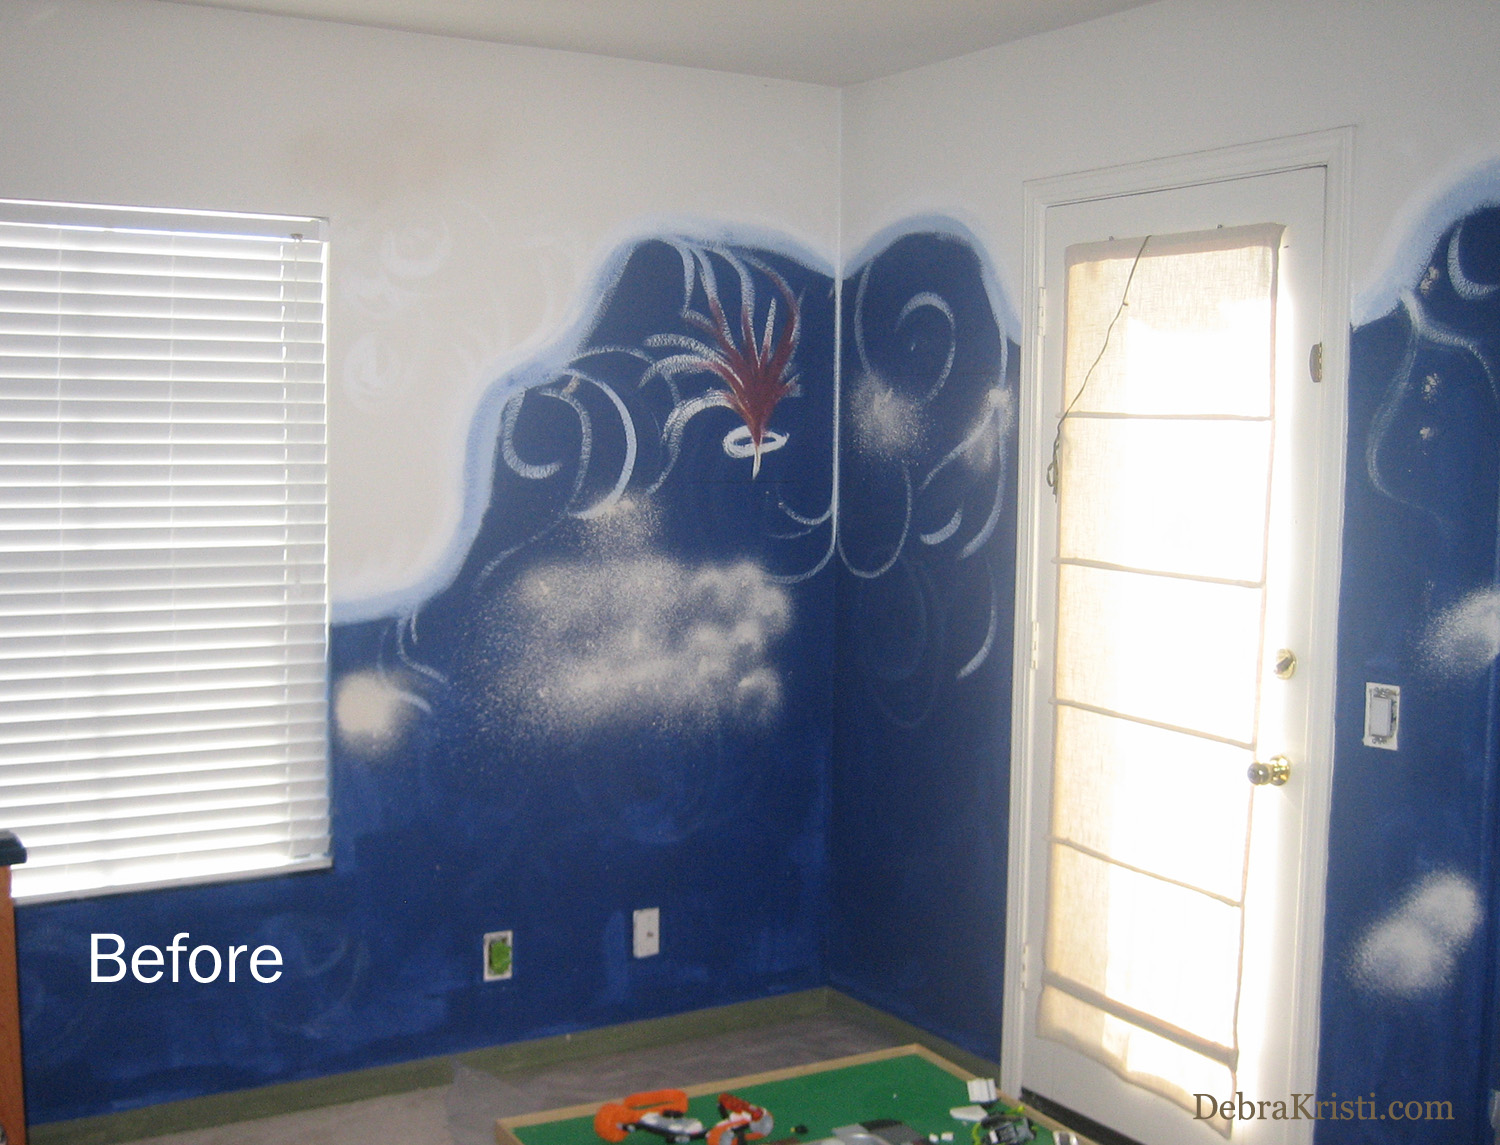 When we undertook the project of transformation, we went for an Indian Jones theme. It can also make a great outdoor adventurers theme.
Every kid should engage their imagination and live a bit of the fantasy.
The three key elements to a successful room transformation:
- Less is more. Fussy walls confuse the eye and leave you tired from over input. Pick one or two good colors. Make sure your walls are calm before you add anything else to the room. Let everything else pull the fun together. It also makes theme changes easier, because let’s face it, when dealing with kids change happens fast and often.
- …………………………………………………………………………………..
- Clean lines. Similar to less is more, clean lines help calm a space. In the case of my son’s room I added crown molding. That may not be in your budget, although there are ways to create the look rather affordably. The rule applies to window treatments, bedding, pillows, etc.
- …………………………………………………………………………………..
- Limit your key elements. It can be easy to lose yourself in a theme and go overboard―bedding, curtains, throw pillows, wallpaper, prints, and the many great accessories available. Don’t do it. Pick a few things that get your point across and work non-thematic items in with them.
So…do you see what I did there? I just told you the same thing three different ways. Think you got the idea? Have fun, but at the same time, keep it simple. That shouldn’t be too hard to do, right?
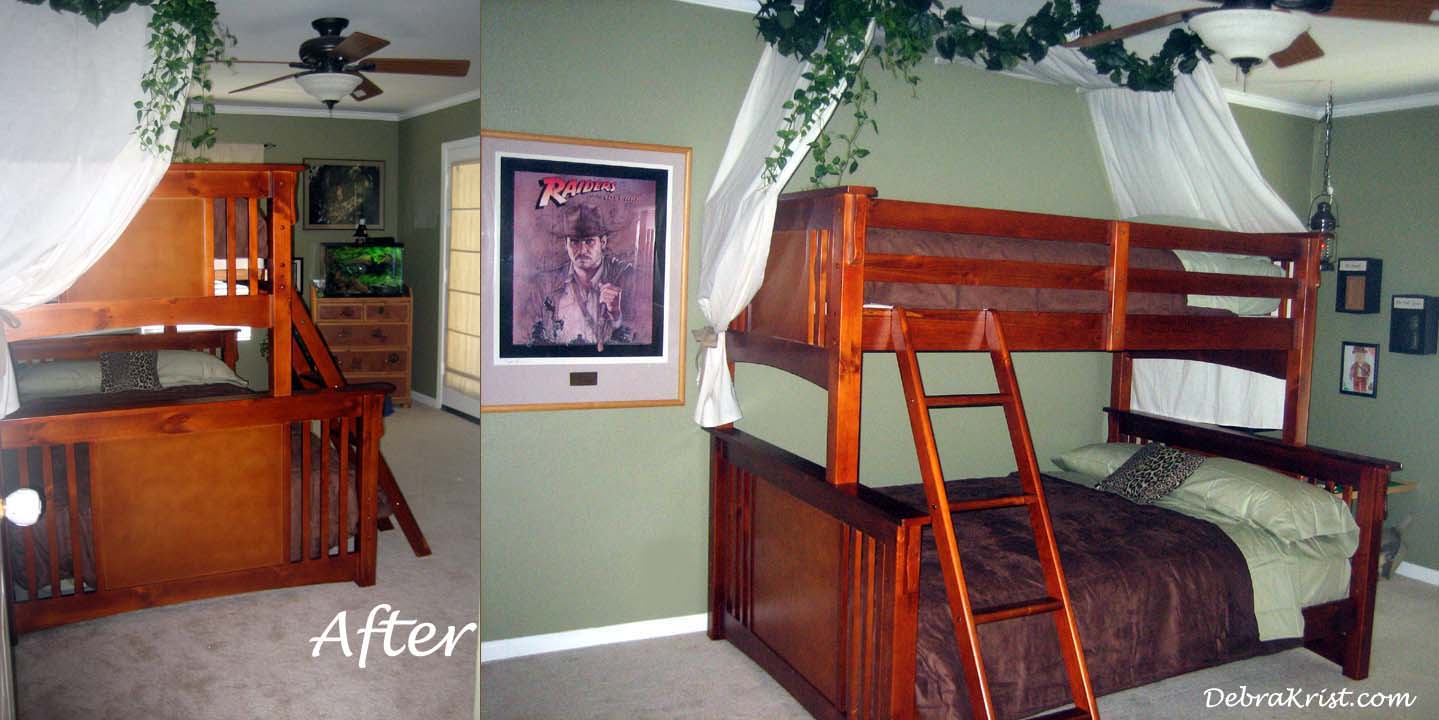
The elements chosen to create this look:
- A couple of quality prints.
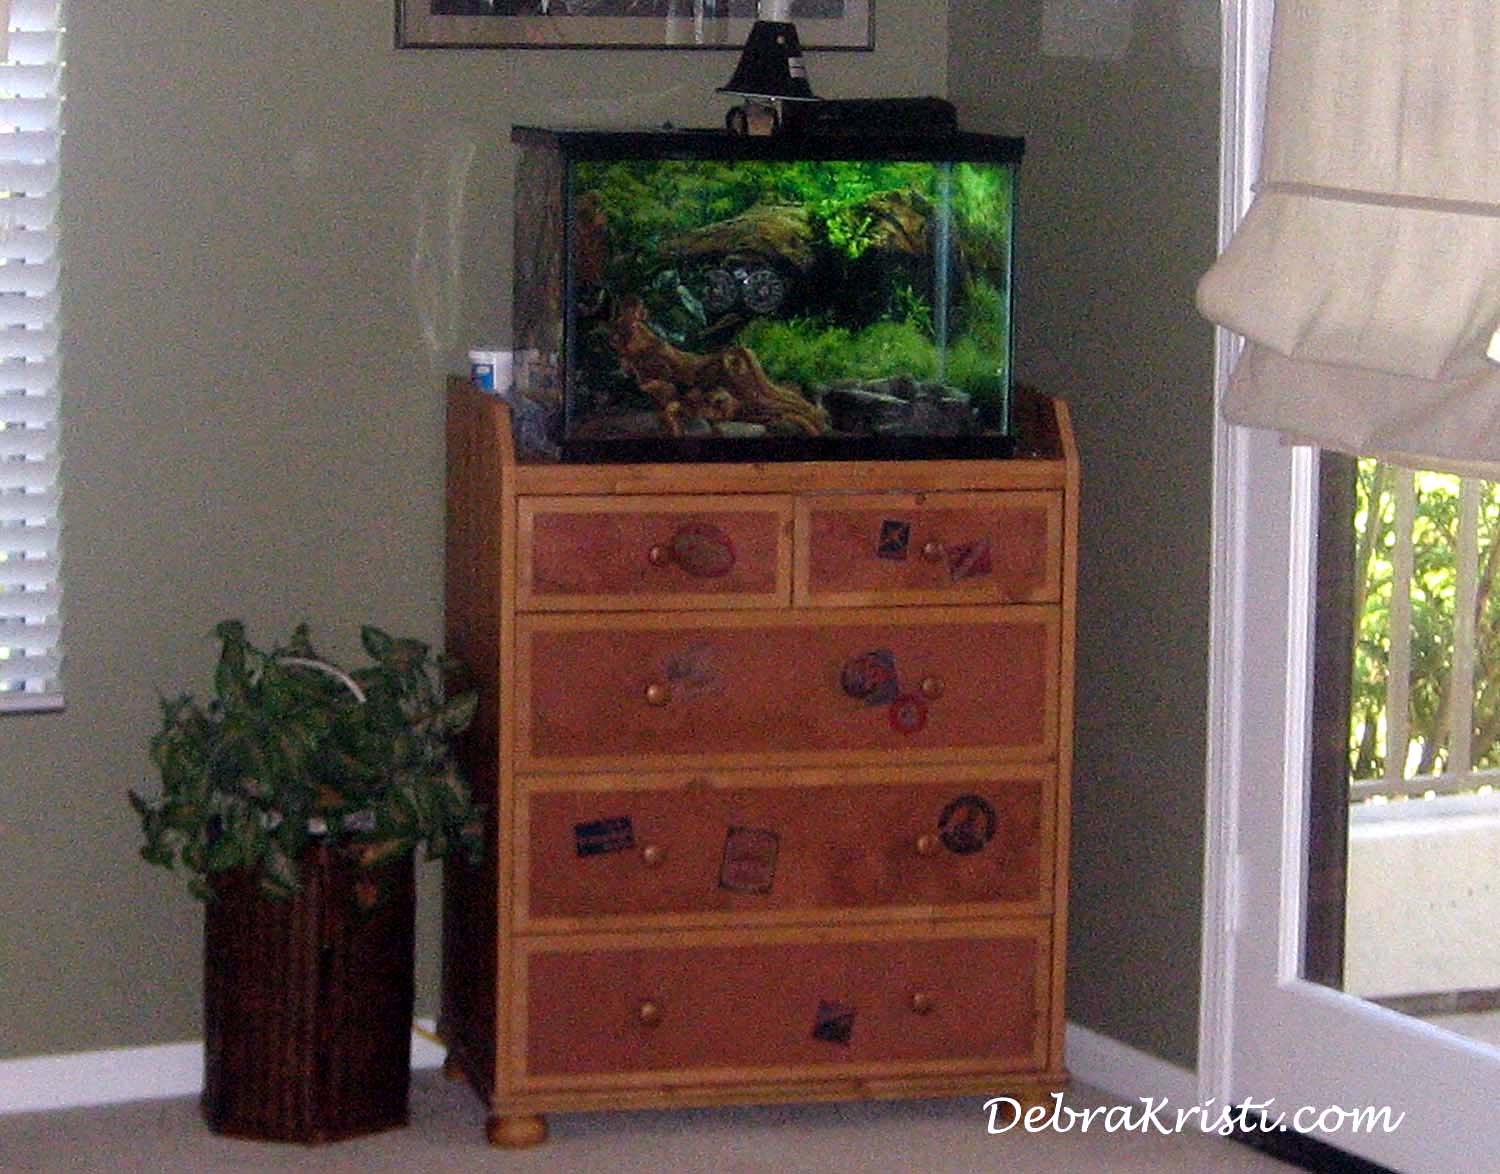
- Faux finish added to the dresser front to give it an old (well-traveled) luggage feel.
- Tent-like-canopy over the bed so your adventurer can feel like he’s camping at night.
- Hanging lantern light for effect makes a fun night-light.
- Recovered the closet doors using chalkboard paint and map wallpaper.
- Adding the leaves was the final touch that turned the room into the great outdoors.
The canopy-tent is the biggest item in this room and I designed that myself. If you want to create one for your home it’s simple enough. Here is what you need:
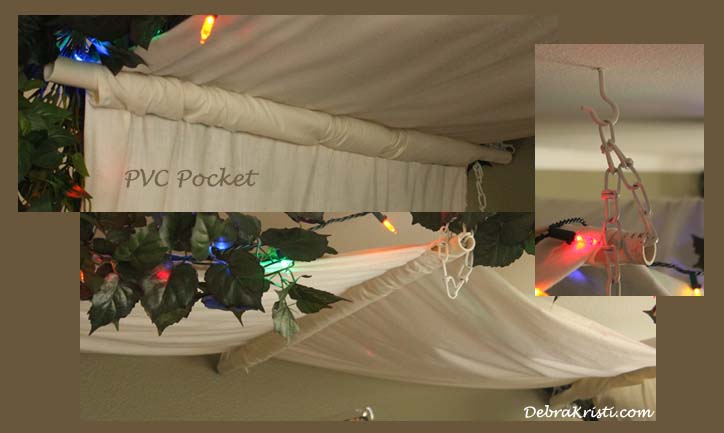
- Three pieces of PVC – measured the width of the bed.
- …………………………………………………………………………………..
- Six sturdy hooks meant for the ceiling and designed for weight. If you aren’t going directly into a beam, think about getting one that will expand when you screw it into place. Keep in mind your child may pull on this. In our case, the cat jumps up on top of the canopy. You want something strong.
- …………………………………………………………………………………..
- Three strips of chain. Measured the width of the bed plus the distance you want the pole to drop down from the ceiling. This will vary depending on your bed and ceiling height. The center pole should be placed closer to the ceiling than the two side poles, there by needing less chain. The outer poles should require chains of the same length.
- …………………………………………………………………………………..
- Material for the canopy. The type of material is a personal choice. To determine how much material you’ll need you’ll want to measure from your start point (where you want the canopy to drop down to) up to the first pole, across to the top pole, over to the last pole, and then down to where you want it to end, allowing for pockets you’ll be adding for the poles. Once you have the material you’ll need to determine where the poles will be, then sew/glue/seam-tape/however-you-want-to-close the PVC pocket.
You should be able to piece it all together now. Slide the poles through the pockets, and chains through the poles. Hook the chains to the hooks on the ceiling. You can adjust how the canopy hangs by adjusting which loops of the chain you use on the hooks.
At Christmas we strung holiday lights across.
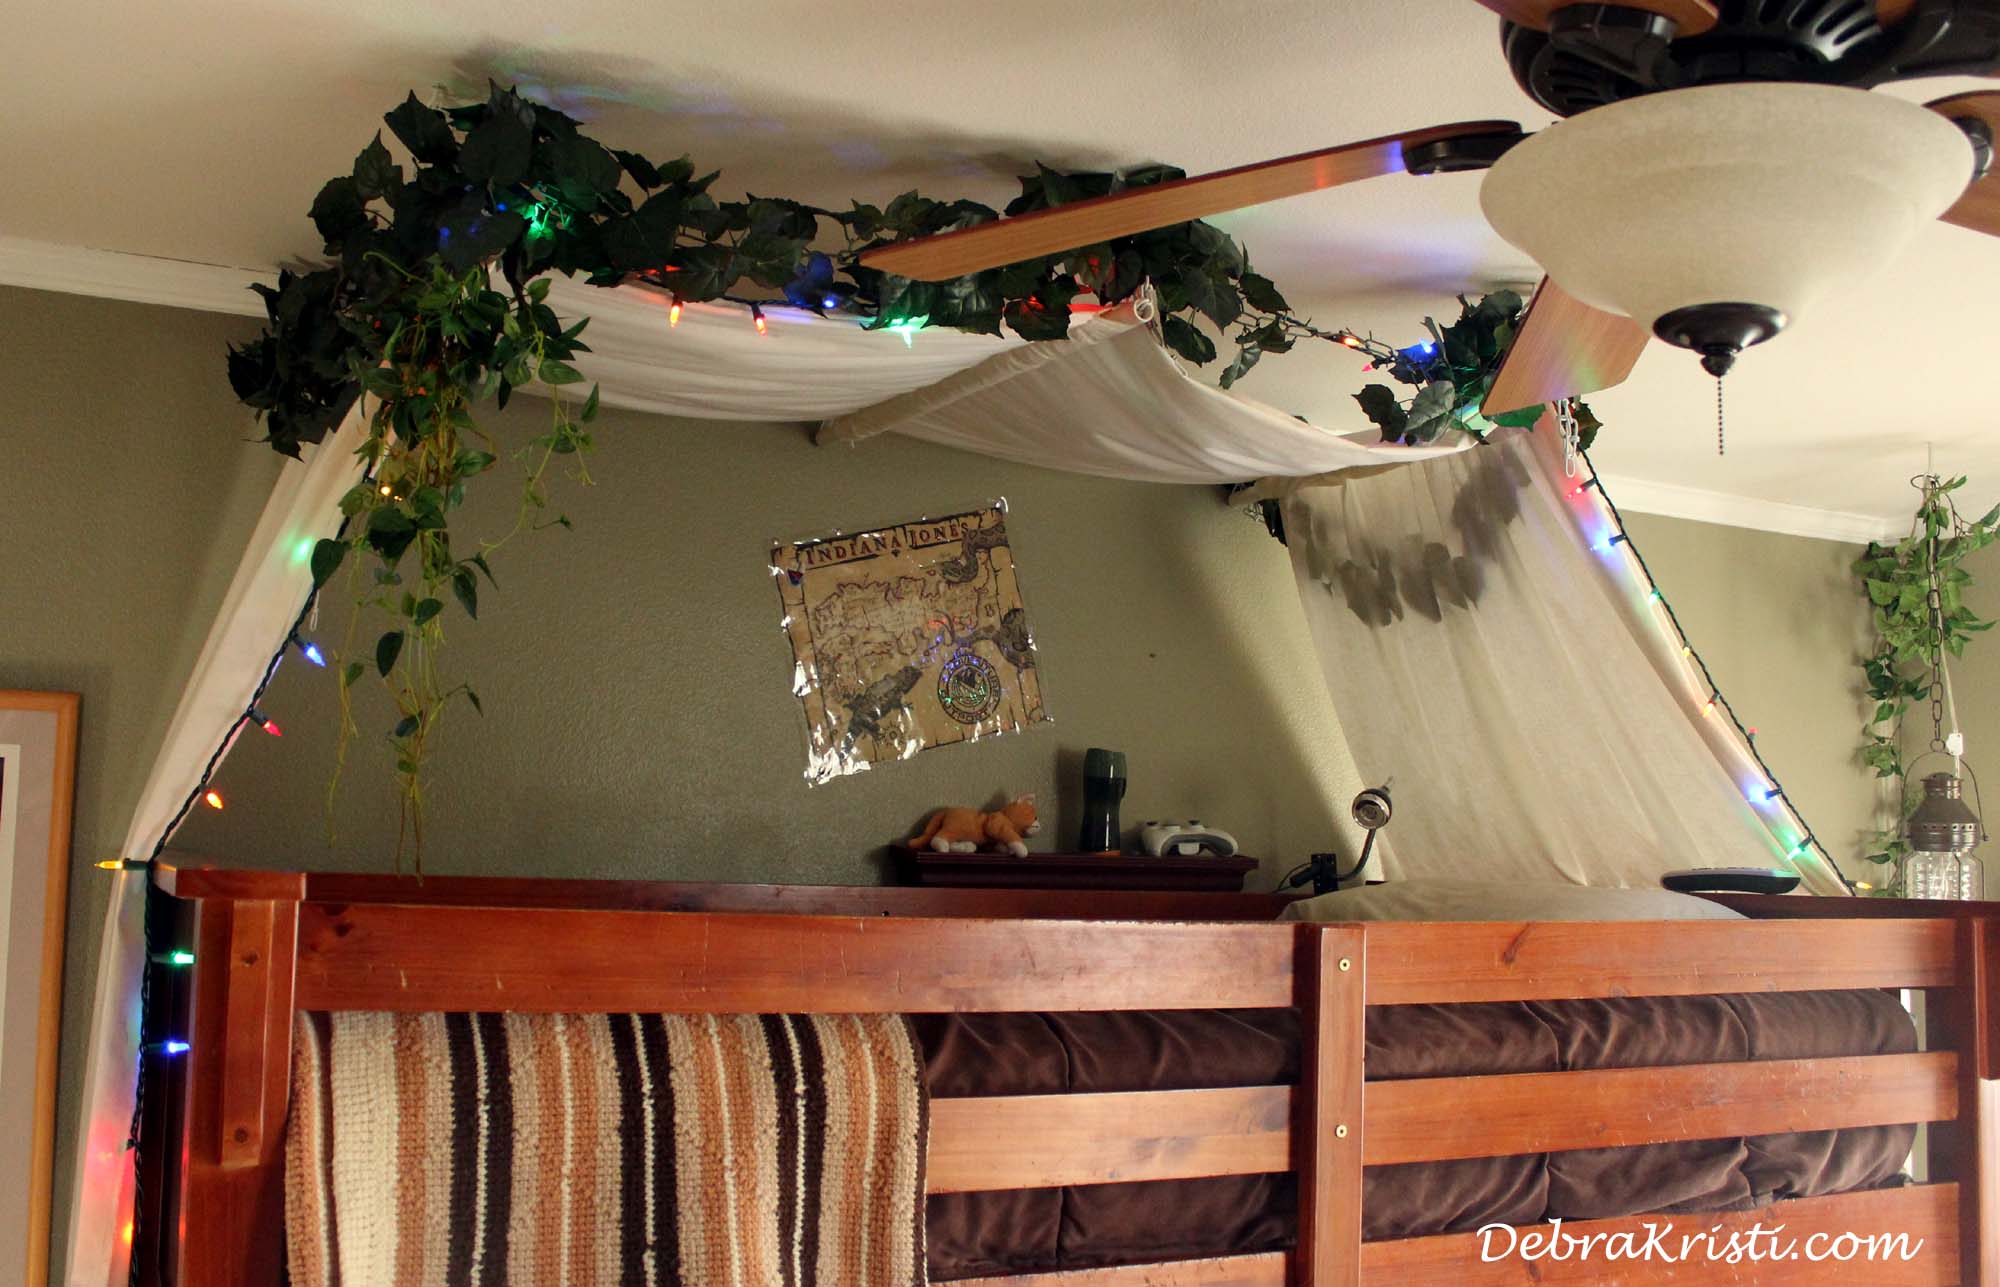
They were such a hit they’ve stayed up since. Change this up for a girl. Imagine it in pink with fine gold star garland and twinkle lights.
What was one of your fine room transformations? Do you have any tips to share with the readers?
~oOo~
Thanks for stopping by! I truly appreciate your support. Until next time, au revoir.

Just enter your email above where it says “Follow”
This is a new blog from what I previously had, so if you followed before and want to continue following you will need to repeat the steps. I’m sorry.


I LOVE that room! What a great transformation. Have I ever done one? Not to that degree, but I totally agree with keeping it simple. Thanks to a couple of rentals, I will NEVER have wallpaper again. EVER. I want painted, light colored walls. Embellishments can come from pictures, throw pillows and a FEW well placed knickknacks. Few because I hate dusting them, lol.
Like you I hate clutter, and I hate wall-to-wall stuff (says me sitting in a small office with…wall-to-wall stuff. I’m working on that though. Gotta get rid of the stuff that fit in the bigger place in town…which I don’t have homes for in this house. Sometimes I’d like to just chuck it all and start over from scratch, but I’ll get there. Maybe sometime yet this century. 😀
Oops…almost left this on the Triberr comment thing again.
Clutter happens before you know it and without your consent. Chalkboard paint on a wall or closet door could come in handy. It creates a large work space notes, be it story outlining, shopping lists or the basic to-do lists.
What a great room! I’m going to keep that canopy idea handy for the next time we redecorate my little one’s room. I’m not sure she’ll ever give up the pink kitties though. 🙂
Kitties are cool. My girl is all about cats. She could be the crazy cat lady some day. He he. She wanted a bed high in the sky so that she could create a canopy beneath it. She hides all her kitties inside it. There’s an idea. 😀
That is an idea! Thanks! 🙂
You’re welcome. You should really thank my youngest. It was her idea. LOL.
Can I hire you to come redo my room?? 😀
😀 I originally wanted to go into interior design, then changed my mind. Funny thing, career choices. Are you going to pay my expenses to fly out there? 😉
I love the room. The only thing I’d add is Harrison Ford, circa, 1980 something with the Fedora and, oh yes, the whip.
Thanks for sharing your projects. Great ideas and suggestions.
Patricia Rickrode
w/a Jansen Schmidt
We actually have a replica of his whip and hat hanging on the wall behind the bed. Unfortunately, he does not come with them. I would have to add to that…the younger Harry, not as he is now. At least, that’s what I would prefer. Not sure about you. Maybe a carbonate version? Oh wait – wrong movie. My bad. LOL.
Thanks for stopping by, Patricia. I’m glad you liked the ideas.
Your son’s room is awesome!
Thanks! He kinda likes it.
That is the Coolest. Bedroom. Ever. What kid wouldn’t love it?
Wow! Thanks so much, Jennette. It was fun to do.
Awesome room! When I was in grad school, I bought sari material and draped it over my bed. Then I took a Chinese print material and covered my duvet cover in it. My bedroom felt so exotic and relaxing.
That sounds so beautiful! I just had the old canopy set made famous by Sear back then. I don’t know if you remember it? I had the set in white, then my duvet was blue. My sister had the set in a yellow-gold with a yellow duvet. IT was SO seventies. LOL. You were clearly a fashion forward girl. 🙂 Love it!
Thanks for stopping by and for your wonderful compliment.
Beautiful! Wow, Debra. I’m so impressed! Your kids are lucky ones. 🙂
Thank you, August. That’s very sweet of you to say. 🙂